
What's in this roadmap
- What a packing list for moving actually needs to do
- Before you start: gather these five things
- The 8-week packing timeline at a glance
- 8 weeks out: storage, garage, and off-season
- 6 to 4 weeks out: secondary rooms and decor
- 2 weeks out: bedrooms and living areas
- 1 week out: daily kitchen and clothes
- Room-by-room packing checklist: the kitchen
- Room-by-room packing checklist: bedrooms and bathroom
- Room-by-room packing checklist: home office and garage
- Your essentials and first-night box
- What NOT to pack: items movers will not take
- Packing supplies and quantities you will need
- A labeling system that survives the truck
- Packing fragile items without breakage
- Illustrative supplies for a 2-bedroom move
- How the packing weeks break down
- A worked example: an illustrative 2-bedroom checklist
- Build your own packing checklist
- The bottom line
Short answer: A moving packing checklist works as two lists at once: a week-by-week timeline starting six to eight weeks out with the rooms you use least, and a room-by-room list of what goes in each box for the kitchen, living areas, bedrooms, bathroom, office and garage. Keep one essentials box per person with you, use up or give away the hazardous and perishable items movers will not load, and expect forty to fifty boxes.
A packing list for moving is only useful if it is ordered, so this checklist lays one out twice over: once as a week-by-week timeline from eight weeks out to moving day, and once as a room-by-room list of what actually goes in the boxes. Most packing stress comes not from the wrapping itself but from doing all of it at once, the night before, with no plan for which room comes first or what movers will refuse to load. A list fixes that by turning a daunting pile into a set of small, dated tasks you can tick off one at a time.
This checklist covers the whole job: the eight-week timeline, a room-by-room packing list for the kitchen, living areas, bedrooms, bathroom, office, and garage, the essentials box you keep with you, the hazardous items movers will not take, the supplies and quantities to buy, a labeling system, and how to pack fragile things so they survive the truck. It pairs with our 8-step packing method, which walks the same job as an ordered process rather than a checklist, our moving-budget roadmap for the cost of supplies and the move, and our moving-cost roadmap for how packing changes the bill. The calculator handles the salary side of a relocation while you read, and the companion below turns your home size and timeline into a box and supply estimate. For the one-room student version of this job, our college move-in roadmap applies the same discipline to a dorm load.
Key takeaways
- Run two lists at once: a week-by-week timeline that says when to pack, and a room-by-room list that says what goes in each box.
- Start about six to eight weeks out with the rooms you use least, storage and off-season first, daily essentials last, so your home stays livable while you pack.
- Keep one essentials box per person with you, not on the truck, so the first night is survivable without opening anything else.
- Movers will not load hazardous, perishable, or irreplaceable items, so plan to use up, give away, or carry those before moving day.
- Illustratively, a two-bedroom home fills around forty to fifty boxes, far more manageable spread across the weeks than crammed into a final weekend.
What a packing list for moving actually needs to do
A packing list for moving earns its place by answering two questions at once: when do I pack each thing, and what exactly goes in the box. Most printable lists answer only one, which is why they feel incomplete halfway through a move. A timeline alone tells you to pack the kitchen in the final week but not how to box the glassware; a room list alone tells you to wrap the plates but not that the garage should have been done a month earlier. This checklist keeps both columns side by side, so every item has a week and a method.
The second job of a good list is to catch the things people forget until they are standing in the way. That means a clear line on the hazardous items movers will not take, a dedicated essentials box that never touches the truck, a supply count so you do not run out of tape mid-room, and a labeling system so unpacking is not an archaeology dig. Handle those four up front and the ordinary wrapping becomes routine. For the same job framed as an ordered process, our 8-step packing method walks it start to finish.
Before you start: gather these five things
This checklist works best if you settle a few basics first, so every later section has real inputs rather than guesses. None of it takes research; it is information you already know or can pin down in a few minutes.
- Your move date, or a target week. The date anchors the timeline and tells you how many weeks you have. Even an approximate week is enough to start counting backward from moving day.
- Your home size. Studio, one-bedroom, two-bedroom, and up, because home size is the main driver of how many boxes and how much padding you need. This sets your supply order.
- A box estimate. A rough count of how many boxes your home will fill, so you buy roughly the right quantity. The companion below estimates this, and buying a little extra is always safer than running short.
- A staging spot. A spare room, a corner of the garage, or a section of the living room where packed and labeled boxes can stack out of the way as you finish each room.
- A count of people and pets. This decides how many essentials boxes you pack and flags whose routine you protect until last, which matters most with children or animals in the house.
With those five in hand, the rest of this checklist turns them into a schedule, a room-by-room list, and a supply order you can actually shop from. The whole plan takes an hour or so to set up and then spreads across several weeks in short sessions rather than one exhausting stretch.
The 8-week packing timeline at a glance
The timeline is the backbone of the whole checklist, and the rule behind it is simple: pack what you use least first, and save daily essentials for last. Counting back from moving day, the early weeks handle storage and the things you will not miss, the middle weeks handle secondary and main rooms, and the final week handles the kitchen and clothes you use every day. Spread this way, no single week is overwhelming and your home stays functional until the end.
Here is the timeline as a checklist you can tick week by week. Adjust the start point to your own runway; a smaller home or a short-notice move compresses the same order into fewer weeks.

| Done | When | Pack this |
|---|---|---|
| ☐ | 8 weeks out | Storage, attic, garage, off-season clothes, and anything you will not touch for a month |
| ☐ | 6 weeks out | Secondary rooms, guest spaces, decor, books, and spare kitchen and dining pieces |
| ☐ | 4 weeks out | Closets, most bedrooms, and the living room beyond daily-use items |
| ☐ | 2 weeks out | The rest of the bedrooms and living areas, leaving only daily essentials out |
| ☐ | 1 week out | Current-season clothes, toiletries, and the kitchen basics you use daily |
| ☐ | Moving day | The essentials box, the last daily items, and a final walkthrough |
Watch out for the instinct to wait until you feel ready to pack the whole house at once; that day never comes, and the pile only grows. Packing one low-stakes area, a closet or a bookshelf, in an evening builds momentum and proves the order works.
8 weeks out: storage, garage, and off-season
The earliest weeks are the easiest wins because you can pack them without disrupting daily life at all. Nothing in storage, the attic, or the garage is something you will reach for before the move, so these boxes can be sealed, labeled, and stacked in your staging spot weeks ahead. This is also the best moment to declutter hard, since every item you sell, donate, or discard now is one you never wrap, carry, or unpack, and on a long-distance move it lowers the weight you pay to ship.
Work through this early-weeks list as you open each storage area. Sort into keep, sell, donate, and discard as you go, so you only box what earns the trip.
| Done | Item | Box / method | Notes |
|---|---|---|---|
| ☐ | Off-season clothes and coats | Large or wardrobe box | Vacuum bags save space for bulky bedding |
| ☐ | Holiday and seasonal decor | Medium, padded | Keep fragile ornaments in a dish kit |
| ☐ | Books and media | Small box | Small boxes only, or they get too heavy to lift |
| ☐ | Tools and hardware | Small, sturdy box | Bundle and tape cords, wrap sharp edges |
| ☐ | Sports and outdoor gear | Large box or original bag | Drain and clean anything that held fuel or water |
Whatever is broken or worn out goes to the discard or recycling pile now, so you are not paying to move trash. If you plan to sell larger items, start early, because good pieces take time to move and the cash helps offset supplies.
6 to 4 weeks out: secondary rooms and decor
With storage handled, the middle weeks move into the rooms you use, but only the parts you can live without for a few weeks. Guest rooms, decor, wall art, spare kitchenware, and the books and games you will not miss all belong here. The goal is to keep shrinking the volume of unpacked stuff so the final week holds only true daily essentials. This is also when the supply order matters most, since you are now boxing in earnest and cannot afford to run out of tape or paper mid-room.
Use this list for the secondary spaces. Pack one room fully before starting the next, so nothing gets scattered and half-packed across the house.
| Done | Item | Box / method | Notes |
|---|---|---|---|
| ☐ | Wall art and mirrors | Flat, on edge, cornered | Never lay framed glass flat where it can be sat on |
| ☐ | Decorative items and vases | Medium, heavily padded | Wrap each piece, fill every gap with paper |
| ☐ | Guest-room linens | Large box | Use as padding around fragile boxes |
| ☐ | Spare kitchen and dining pieces | Medium, dish kit | Stand plates on edge, cushion between each |
| ☐ | Extra books, games, hobby gear | Small to medium | Keep box weight to what one person can carry |
For how these supply and packing lines fit the wider budget, our moving-budget roadmap breaks materials out as their own figure, and the calculator sizes the salary side of the move in parallel.
2 weeks out: bedrooms and living areas
The final full-room stretch clears the bedrooms and living areas down to the daily essentials. Clothes you are not currently wearing, most of the closet, the bulk of the living room, and anything decorative can go now, leaving out only what you use every day and the furniture you will disassemble near the end. This is the week to prepare the heavy and awkward pieces too: label the hardware bags, plan the disassembly, and confirm who is lifting what on moving day.
Work this list room by room, and keep a numbered inventory going as you seal each box.
| Done | Item | Box / method | Notes |
|---|---|---|---|
| ☐ | Hanging clothes | Wardrobe box | Move on the hanger, ready to rehang |
| ☐ | Folded clothes and shoes | Medium box or dresser drawers | Leave lightweight clothes in secured drawers |
| ☐ | Bedding and pillows | Large box | Light and bulky, ideal for the big boxes |
| ☐ | Living-room electronics | Original box or padded medium | Photograph the cabling before you unplug |
| ☐ | Bed frames and table legs | Disassembled, hardware bagged | Tape the labeled hardware bag to the piece |
Watch out for over-packing boxes until they are too heavy to lift safely, which is how box bottoms blow out and backs get wrenched. Keep dense, heavy items in small boxes and light bulky ones in large boxes.
1 week out: daily kitchen and clothes
The last week is the one that actually feels like moving, because it touches the things you use every day. Pack the bulk of the kitchen now, leaving out only a few dishes, a pan, and the coffee setup for the final days, and pack all but a change or two of current clothes. The house should feel sparse by the end of this week, with only the essentials and the items destined for your first-night box still out.
This is the kitchen-heavy stretch, so it deserves its own careful list. The kitchen holds more fragile and awkward items than any other room, so slow down here.
| Done | Item | Box / method | Notes |
|---|---|---|---|
| ☐ | Everyday dishes and glassware | Small to medium, dish kit | Stand plates on edge, wrap each glass |
| ☐ | Pots, pans, and bakeware | Medium box | Nest with paper between each piece |
| ☐ | Small appliances | Original box or padded medium | Secure cords, cushion on all sides |
| ☐ | Pantry, dry and canned goods | Small box | Toss expired items, small boxes only, they get heavy |
| ☐ | Cutlery and utensils | Small box | Bundle sharp knives in a guard or thick towel |
Leave a minimal kitchen kit out for the final days, and plan to pack it into the first-night box on moving day so your last night and first morning are not spent hunting through sealed cartons.
Room-by-room packing checklist: the kitchen
The kitchen deserves a second, closer look because it is the room most likely to produce breakage and the one people most often underestimate. Beyond the everyday items above, a full kitchen list catches the things that hide in the backs of cabinets: serving platters, seldom-used gadgets, spice racks, and the odd fragile heirloom dish. Work top to bottom and back to front, so nothing is left behind in a high cabinet or a deep drawer.
| Done | Item | Box / method | Notes |
|---|---|---|---|
| ☐ | Serving dishes and platters | Medium, dish kit | Large flat pieces on edge, well cushioned |
| ☐ | Stemware and fine glass | Small, cell kit | Individual dividers prevent glass-on-glass contact |
| ☐ | Knives and sharp tools | Small box | Sheathe or wrap blades, mark the box clearly |
| ☐ | Spices and open dry goods | Small box, sealed bags | Seal open containers so they do not spill |
| ☐ | Cleaning liquids under the sink | Do not pack for the truck | Many are hazardous, see the what-not-to-pack list below |
The under-sink cabinet is where the hazardous-item rule first bites, since cleaning chemicals, drain openers, and aerosols live there. Set those aside for the disposal or carry-yourself pile rather than boxing them with the dishes.
Room-by-room packing checklist: bedrooms and bathroom
Bedrooms and bathrooms are lower-risk than the kitchen but easy to leave half-done, because the last few daily items linger until the end. The trick is to pack the bulk early and keep only a clearly defined daily kit out. Bathrooms in particular hide liquids and medications that belong in the essentials box rather than a sealed carton, so separate those as you go.
| Done | Item | Box / method | Notes |
|---|---|---|---|
| ☐ | Bedroom clothing and shoes | Wardrobe and medium boxes | Hanging clothes stay on hangers |
| ☐ | Jewelry and small valuables | Carry with you | Do not load irreplaceable items on the truck |
| ☐ | Bathroom towels and linens | Large box | Double as padding for fragile boxes |
| ☐ | Toiletries and cosmetics | Small box, sealed bags | Bag liquids so a leak does not ruin a box |
| ☐ | Medications and daily toiletries | Essentials box | These travel with you, never on the truck |
Keep the medications, chargers, and a change of clothes back for the first-night box covered below, and pack the bedrooms and bathrooms of any children or pets last so their routine stays intact as long as possible. Our note on moving with pets covers the animal side of that final day.
Room-by-room packing checklist: home office and garage
The home office and garage bookend the difficulty range: the office is full of fragile electronics and sensitive documents, while the garage is heavy, awkward, and full of items movers will not take. Both reward being handled deliberately rather than swept into generic boxes. In the office, photograph your cable setup before unplugging and keep essential documents with you. In the garage, separate the fuels and chemicals early, because they cannot ride on the truck.
| Done | Item | Box / method | Notes |
|---|---|---|---|
| ☐ | Computers and monitors | Original box or padded medium | Back up data first, wrap screens carefully |
| ☐ | Cables, chargers, small tech | Small box, labeled bags | Photograph connections before unplugging |
| ☐ | Important documents | Carry with you | Passports, records, and files stay in your vehicle |
| ☐ | Power tools and hand tools | Small, sturdy boxes | Wrap sharp edges, keep box weight low |
| ☐ | Fuels, propane, chemicals | Do not pack, dispose safely | Refused by movers, see the list below |
The garage is the single biggest source of banned items in most homes, so treat it as the room where the what-not-to-pack list matters most, not an afterthought you deal with on moving day.
Your essentials and first-night box
The essentials box, sometimes called a first-night or open-first box, is the most important carton of the whole move, and the one rule that never bends is that it travels with you rather than on the truck. It holds everything you need in the first day and night before you unpack anything else, which matters most on a long-distance move where your shipment may arrive a day or several after you do. Pack one per person, label it so it stands out, and set it by the door or in your car so it cannot be swept onto the truck.
| Done | Item | For | Notes |
|---|---|---|---|
| ☐ | Medications and medical supplies | Each person | Never load on the truck |
| ☐ | Phone and device chargers | Each person | The first thing everyone reaches for |
| ☐ | Change of clothes and pajamas | Each person | One or two days is plenty |
| ☐ | Toiletries, towel, toilet paper | Household | Enough for the first night and morning |
| ☐ | Snacks, water, basic tools | Household | Box cutter and screwdriver open everything else |
| ☐ | Documents, cash, keys | Household | Keep with you, not in any packed box |
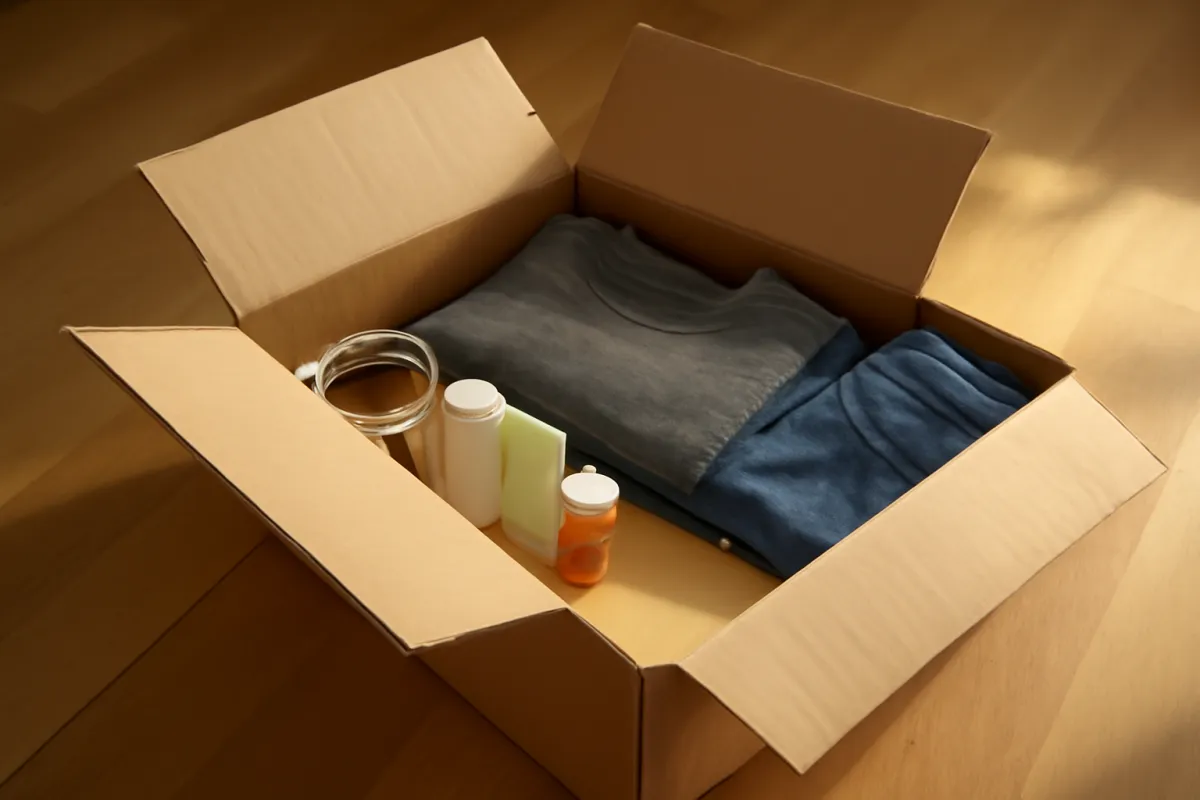
Many people add a small kitchen-morning box with coffee or tea, a couple of dishes, and breakfast basics, so the first morning starts with something normal rather than a search through sealed cartons. Getting this one box right is the difference between a bearable first night and a miserable one, and it costs nothing but a little forethought.
What NOT to pack: items movers will not take
Every packing list needs a stop list, because professional movers will not load hazardous, perishable, or irreplaceable items, and boxing them anyway means they get pulled at the truck or, worse, ride in a hot trailer where they can leak or ignite. The categories are consistent across most movers, though the exact wording varies, so confirm the prohibited list with your own company. Plan to use up, give away, or safely dispose of these before moving day rather than discovering them in a box that morning.
| Do not pack | Category | What to do instead |
|---|---|---|
| ☐ | Propane, gasoline, kerosene, lighter fluid | Empty and drain equipment, dispose of fuel safely |
| ☐ | Aerosols, paint, solvents, cleaners | Use up, give away, or take to hazardous-waste drop-off |
| ☐ | Pool and garden chemicals, fertilizer | Dispose per local rules, do not box |
| ☐ | Ammunition, fireworks, matches, charcoal | Transport per local law or dispose safely |
| ☐ | Fresh, frozen, and perishable food | Eat down the pantry, donate unopened goods |
| ☐ | Plants, especially interstate | Check agricultural rules, gift locally if refused |
| ☐ | Cash, jewelry, documents, heirlooms | Carry with you, never on the truck |
The garage and the under-sink cabinet produce most of these, so hit those rooms early enough to deal with disposal properly. Hazardous-waste drop-offs often run on limited schedules, and rushing this on moving morning is how banned items end up hidden in a box.
Packing supplies and quantities you will need
Running out of supplies mid-room is one of the most common ways a good pack stalls, so buy the full kit up front and a little extra. The core list is short, but the quantities are what people get wrong. Buy a mix of box sizes on purpose: small boxes for dense heavy things like books, medium boxes for most rooms, and a few large boxes for light bulky items like bedding, plus a couple of wardrobe boxes for hanging clothes.
| Done | Supply | Illustrative quantity (2-bedroom) | Notes |
|---|---|---|---|
| ☐ | Small boxes | ~16 | Books, canned goods, heavy dense items |
| ☐ | Medium boxes | ~20 | The workhorse size for most rooms |
| ☐ | Large boxes | ~9 | Bedding, pillows, light bulky items |
| ☐ | Wardrobe boxes | ~3 | Hang clothes straight from the closet |
| ☐ | Packing tape | 4 to 6 rolls | With a dispenser, do not skimp here |
| ☐ | Packing paper and bubble wrap | A generous bundle | Under-padding shows up as broken dishes |
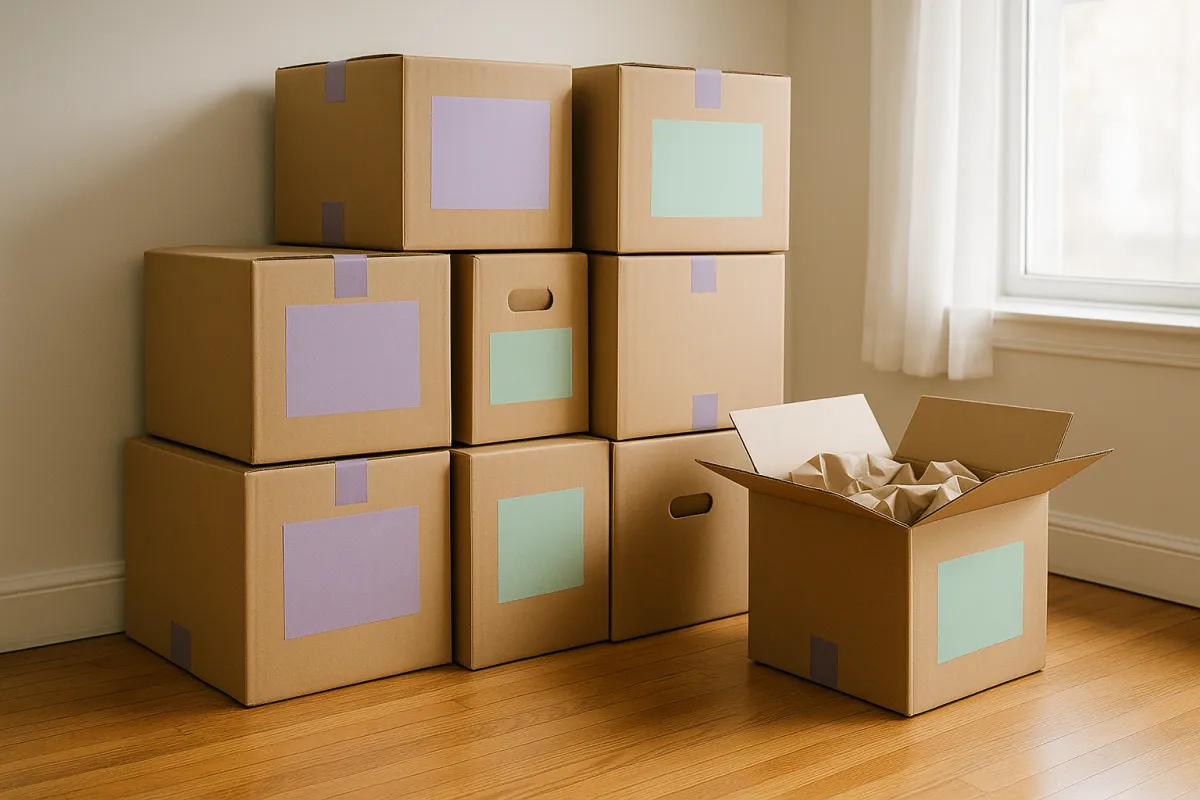
Those figures scale with home size, so a studio needs far fewer and a four-bedroom home far more. Buy a little over your estimate, since most suppliers refund unused boxes and running short is the more expensive problem. The companion below turns your home size into a supply order, and our moving-cost roadmap shows how the materials line fits the overall bill.
A labeling system that survives the truck
Labeling is the step that pays off most and gets skipped most, and a simple system turns unpacking from a guessing game into a checklist. Write the destination room and a few words on the contents on the top and at least one side of every box, so a label is visible however the box is stacked. Number each box and record the number and its contents on a running inventory, on paper or your phone, because the numbered list is how you confirm at the far end that every box arrived.
- Room plus contents, on two sides. Labeling only the top is invisible once boxes are stacked, and writing something vague like kitchen tells you nothing when you are hunting for a specific item.
- A number on every box. Number sequentially and keep the inventory current as you seal each box, so a missing box is impossible to overlook at the far end.
- A fragile mark on more than one side. Flag the boxes that need care plainly, and tell the movers which ones they are.
- A first-open flag. Mark the boxes you will want first, so they come off the truck early and land in the right room.
- An optional color code. Colored tape or dots per room make it obvious at a glance where each box belongs as it comes off the truck.
Keep your inventory somewhere you will not pack it by accident, and treat it as the single document that protects you if a box goes missing on a long-distance move.
Packing fragile items without breakage
Fragile items are where a rushed pack does the most damage, so they earn their own method: wrap each item individually, cushion the box on every side, and never let hard surfaces touch. Line the bottom of a small or medium box with crumpled paper, wrap each glass, plate, or delicate object in paper or bubble wrap, and fill every gap so nothing shifts when you gently shake the box. Finish with a layer of padding on top before you close it, and keep fragile boxes light enough to ride at the top of a stack rather than crushed at the bottom.
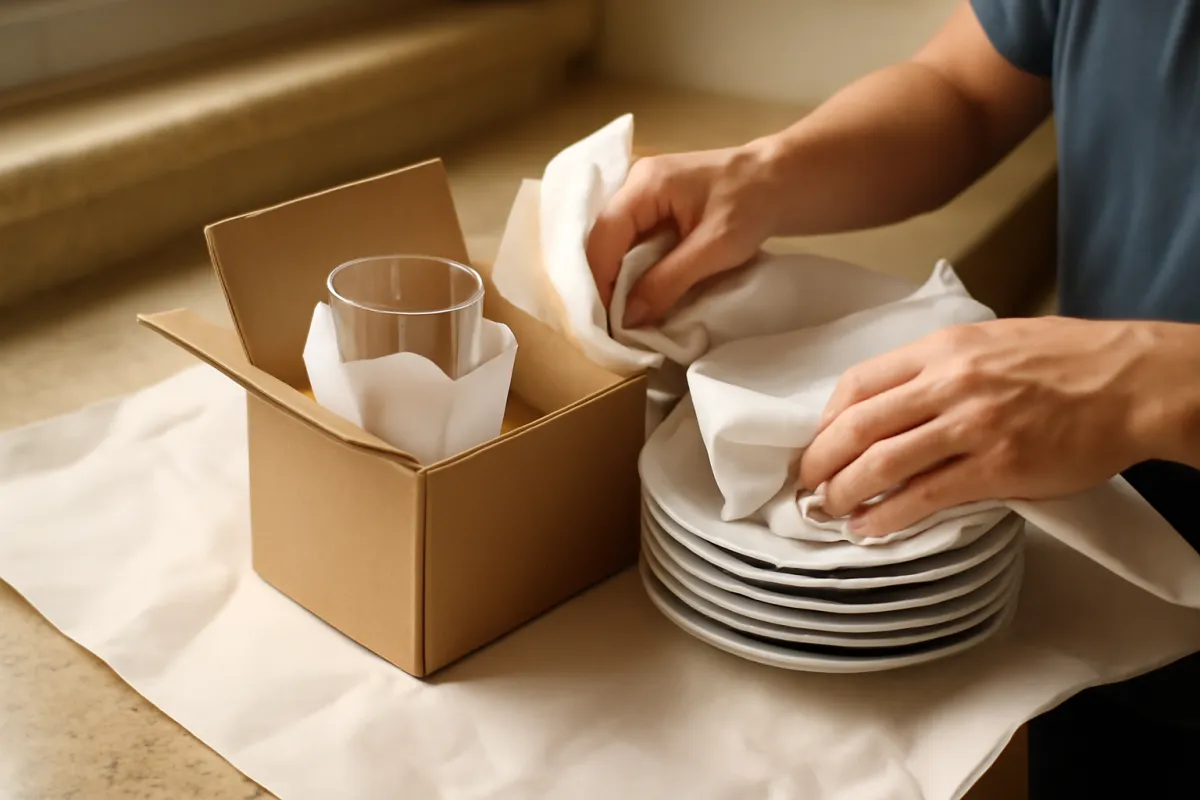
- Stand plates on edge. A plate on edge, like a record, resists the pressure of a stack far better than one lying flat.
- Cell kits for glassware. Cardboard dividers keep stemware and glasses from touching, which is where most breakage starts.
- Heavy at the bottom, light on top. Inside each box and across the stack, weight goes low so nothing delicate is crushed.
- Art and mirrors travel on edge. Wrap, corner, and stand framed glass upright, never flat where it can be sat on.
- Photograph valuables before wrapping. A quick photo helps if you ever need to document a claim, and irreplaceable pieces are better carried with you.
On a long-distance move, protection matters even more because boxes are handled more and travel farther; our long-distance roadmap covers the liability and protection choices that sit alongside careful packing.
Illustrative supplies for a 2-bedroom move
Before the worked example, it helps to see how a supply order splits for a typical two-bedroom home, because the box mix is not even. Medium boxes do most of the work, small boxes carry the dense and heavy items, and the large, wardrobe, and specialty pieces round it out. The chart below shows one illustrative split; scale every bar up for a larger home or down for a studio.
Illustrative box mix for a 2-bedroom move
A rough split of the roughly forty-five boxes a two-bedroom home might fill on this checklist's illustrative model. Illustrative, not a guarantee; your mix depends on how much you own.
Medium boxes are the workhorse; small boxes hold the heavy dense items so nobody lifts a carton they cannot carry. Buy a little over the estimate and return the unused boxes.
How the packing weeks break down
Seeing the timeline as shares makes the point that the early weeks carry as much of the work as the last ones, just on the things you notice less. The rarely-used rooms sit at the front on purpose, because they are easy to pack without disrupting daily life, while the kitchen and daily essentials, the parts that feel like moving, land at the end. Spread this way, no single week is overwhelming.
An 8-week packing timeline, as shares
How the packing work distributes across a roughly eight-week window, as a share of the whole. Illustrative model; adjust to your own dates and home size.
The front of the timeline is the low-stakes rooms you can pack without disrupting daily life. Leave them for the end and the whole pack compresses into a stressful final week alongside the kitchen.
A worked example: an illustrative 2-bedroom checklist
Run one realistic move through the whole checklist. The mover: a couple packing a two-bedroom apartment about eight weeks out, doing the packing themselves and hiring help only for the truck and heavy furniture. They start by settling the five basics, a move date, their two-bedroom size, a rough box estimate near forty-five, a staging corner in the second bedroom, and a household of two with no pets, which sets two essentials boxes.
Eight weeks out they clear the hall closet, the balcony storage, and off-season clothes, selling an old dresser and donating three bags of clothes as they go. Six to four weeks out they pack the guest space, decor, and spare kitchenware, ordering supplies against the two-bedroom mix in the chart above. Two weeks out they clear the bedrooms and living room down to daily items and prep the bed frame and table for disassembly, bagging and taping the hardware. The final week is the kitchen and current clothes, wrapping glassware in a cell kit and standing plates on edge.
On moving day they pack the two essentials boxes plus a kitchen-morning box and set them in their own car. They also work the stop list deliberately: the propane camp stove, a half-can of paint, and the under-sink cleaners go to a hazardous-waste drop-off the week before, not into a box. On the illustrative model this checklist uses, their home fills somewhere around forty to fifty boxes, which feels overwhelming as one number but breaks down to a handful a week across the timeline, an evening or two of work at a time.
Build your own packing checklist
Everything above assembles into a checklist you can run on your own home in a few evenings rather than one exhausting weekend. Settle the five basics, work the eight-week timeline from storage down to daily essentials, follow the room-by-room lists so nothing is scattered, pull the hazardous items into a disposal pile early, buy the supplies in the right quantities, label every box against a numbered inventory, and keep one essentials box per person with you. The same sequence works whether you are packing a studio or a four-bedroom house; only the number of boxes and weeks changes.
The companion beside this checklist sizes the job for you. Choose your home size, the weeks until your move, and the number of people, and it returns an illustrative box count, a split of small, medium, large, and wardrobe boxes, a tape and paper estimate, the number of essentials boxes, and a plain-language weekly pace. Change the weeks and watch the pace shift; change the home size and watch the supply order move. Pair it with the calculator for the salary side of a relocation and our moving-budget roadmap for the cost of it all, and the vague dread of packing a whole home becomes a dated schedule and a shopping list you can act on.
The bottom line
A packing list for moving works when it answers both questions at once: when to pack each thing, and what goes in the box. Run the eight-week timeline from storage and off-season items down to the daily kitchen, follow the room-by-room lists so nothing scatters, keep an essentials box per person with you rather than on the truck, pull the hazardous items movers will not take into a disposal pile early, buy supplies in the right quantities, and label every box against a numbered inventory. Taken one room and one week at a time, packing stops being the frantic final task and becomes a series of small, finished jobs, and your belongings arrive intact and findable. Illustratively, a two-bedroom home fills around forty to fifty boxes, far easier spread across the weeks than crammed into a final weekend. Pair this checklist with our 8-step packing method for the process view, our truck-loading walkthrough for the day the boxes meet the ramp, our moving-budget roadmap and moving-cost roadmap for the money, and let the list turn a daunting pile into a plan you can work.
This checklist is published by the ReloPeak desk for education, not as a moving quote, a contract, or professional advice. Every figure here, the box counts, the supply quantities, and the weekly shares, is illustrative, chosen to show how the pieces of a pack fit together rather than to predict your own numbers; what you actually need moves with how much you own, your home size, and the move you are making. The list of items movers will not take is a general guide only, and prohibited-item policies, hazardous-waste rules, and interstate plant and agricultural regulations vary by company and location, so confirm the specifics with your own mover and local authorities before moving day rather than relying on this list alone.
Frequently asked questions
What should be on a packing list for moving?
A complete packing list for moving has two halves that work together: a timeline that says what to pack each week, and a room-by-room list that says what goes in each box. The timeline runs from about eight weeks out, when you pack storage and off-season items, down to moving day, when the essentials box is the last thing you carry. The room lists cover the kitchen, living areas, bedrooms, bathrooms, a home office, and the garage, each with its own fragile and heavy items flagged. On top of those, a good list includes a supplies section with box and tape quantities, a labeling system, and a short list of what NOT to pack because movers will not take it. Kept in one place, that checklist turns a vague pile into a set of small, dated tasks you can tick off.
How many weeks before a move should I start packing?
Starting about six to eight weeks out is a workable target for most homes, and earlier for a large household or a long-distance move. You do not pack everything at once: you begin with the rooms and items you touch least, such as storage, the garage, off-season clothes, and books, then work forward to daily essentials in the final week. This staged order keeps your home livable while you pack and means the last box you seal is the first one you will open. If your move is short-notice, start immediately and lean harder on decluttering to cut the volume, since a compressed one-week version of the same checklist still beats improvising the night before. The companion beside this checklist turns your weeks-until-move into a rough boxes-per-week pace.
What should I pack first when moving?
Pack what you use least first and save daily essentials for last. Start with storage areas, the garage, the attic, and closets full of things you will not miss for a month: off-season clothes, spare linens, books, decor, and extra kitchen and dining pieces. Then move through secondary rooms and guest spaces before you reach the bedrooms and main living areas. Leave the kitchen basics, current-season clothing, toiletries, medications, and the things you use every day until the final days. Packing in this order keeps the house functional while you work and means you are never digging through sealed boxes for a coffee maker or a phone charger the night before you move.
What items will movers not take?
Professional movers will not load hazardous, perishable, or irreplaceable items, and most decline the same categories. Hazardous items include propane tanks, gasoline and other fuels, aerosols, paint and solvents, pool and garden chemicals, fertilizer, charcoal, lighter fluid, fireworks, ammunition, matches, and many cleaning chemicals, because they can leak, ignite, or explode in a hot truck. Perishables like fresh and frozen food, open containers, and most plants are refused because they spoil or cross agricultural rules on an interstate move. Movers also ask you to carry irreplaceable things yourself, such as cash, jewelry, key documents, medications, and small heirlooms, rather than loading them at all. Confirm the exact prohibited list with your own mover, because policies vary, and plan to use up, give away, or safely dispose of the banned items before moving day.
What should be in a first-night box for moving?
A first-night or essentials box holds everything you need in the first day and night at the new place before you unpack anything else, and you keep it with you rather than on the truck. A common list includes medications and any medical supplies, phone and device chargers, a change of clothes per person, basic toiletries and a towel, toilet paper, important documents, snacks and water, a few basic tools such as a box cutter and a screwdriver, and whatever a child or pet needs. Many people add a small kitchen-morning box with coffee or tea, a couple of dishes, and breakfast basics so the first morning feels normal. Pack it last, label it so it stands out, and set it by the door or in your own vehicle so it never gets swept onto the truck by mistake.
How many boxes do I need to pack for a move?
There is no single number, because it depends on your home size and how much you own, but an illustrative range helps you buy supplies. On the model this checklist uses, a studio might fill around fifteen to twenty boxes, a one-bedroom around twenty-five to thirty, a two-bedroom around forty to fifty, a three-bedroom around sixty to seventy, and a four-bedroom into the nineties or more. Mix small boxes for dense, heavy things like books, medium boxes for most rooms, and a few large boxes for light, bulky items like bedding, plus a couple of wardrobe boxes for hanging clothes. Buy a little more than you think you need, since running out mid-pack stalls the whole effort and most suppliers refund unused boxes. The companion below estimates a box and supply count for your own home size.
How should I label moving boxes?
Label every box by destination room and a few words on the contents, written on the top and at least one side so a label is visible however the box is stacked. Number each box and jot the number and its contents on a simple inventory list, on paper or your phone, because a numbered list is how you confirm at the far end that every box arrived. Mark fragile boxes plainly on more than one side, and flag the ones you will want first so they come off the truck early. Some people add a color code per room using colored tape or dots, which makes it obvious at a glance where each box belongs when it comes off the truck. The habit that fails most often is labeling only the top, which is invisible once boxes are stacked, or writing something vague like kitchen that tells you nothing later.
What packing supplies do I need for a move?
The core kit is short: moving boxes in a few sizes, strong packing tape with a dispenser, padding such as packing paper and bubble wrap, a marker for labeling, and specialty items like wardrobe boxes and dish kits if you need them. Buy a mix of sizes on purpose, with small boxes for dense heavy things, medium boxes for most rooms, and a few large boxes for light bulky items. As an illustrative starting point for a two-bedroom home, plan on roughly forty-five boxes, several rolls of tape, and a generous bundle of packing paper, then adjust up for a larger home. Under-padding is a false economy that shows up as broken dishes, so err toward more paper than you think you need. The companion beside this checklist turns your home size into a supply order you can shop from.