What's in this roadmap
- Why the kitchen is the hardest room to pack
- Before you start: what you need on hand
- Step 1: Gather the right kitchen packing supplies
- Step 2: Pack in order, least-used items first
- Step 3: How to pack plates and bowls
- Step 4: How to pack glasses and stemware
- Step 5: How to pack pots, pans, and lids
- Step 6: How to pack small appliances
- Step 7: How to pack knives safely
- Step 8: Sort the pantry (what to toss vs move)
- Step 9: Label the kitchen boxes clearly
- Step 10: Pack an open-first kitchen box
- How many boxes you need for a kitchen
- An item-by-item kitchen packing table
- A worked example: packing an illustrative kitchen
- Common kitchen-packing mistakes that cost you
- Troubleshooting: when packing the kitchen meets reality
- Run your own kitchen pack
- Your kitchen packing checklist
- The bottom line
Short answer: Pack a kitchen with real dish-pack boxes, plenty of packing paper, bubble wrap and glass cell dividers. Pack the least-used items first, specialty appliances and serving pieces, and save the daily dishes, a pan and the coffee setup for the last day. Stand wrapped plates on edge like records, give each glass its own cell, sheath every knife blade, bag opened pantry items and toss perishables. Illustratively an average kitchen fills around nine boxes.
Learning how to pack a kitchen for moving is the task most people dread and most people leave for last, and that combination is exactly why kitchens produce more broken dishes and midnight scrambles than any other room. A kitchen is dense, fragile, and full of oddly shaped things: plates that crack under a stack, glasses that shatter if they touch, knives that cut whoever reaches in blind, and a pantry that quietly becomes a science experiment if you box it wrong. The good news is that packing a kitchen rewards a method far more than it rewards speed, and the method is short enough to run one cabinet at a time over a few calm evenings.
This roadmap walks you through packing a kitchen step by step, from gathering dish-pack boxes and cell dividers to wrapping plates on edge, cushioning stemware, sorting the pantry, and setting aside an open-first box you keep with you. It sits alongside our broader packing roadmap, which covers the whole home in eight steps, our room-by-room moving packing checklist, which turns the job into a weekly plan, and our take on whether packing cubes are worth it for clothes and soft goods. The calculator handles the salary side of a relocation while you read, and the companion below estimates how many kitchen boxes and supplies your own kitchen needs.
Key takeaways
- Get real dish-pack boxes, a generous supply of packing paper, bubble wrap, and glass cell dividers before you start, because a kitchen eats padding faster than any other room.
- Pack the least-used items first, specialty appliances and serving pieces, and save the daily dishes, a pan, and the coffee setup for the final day.
- Stand wrapped plates on edge like records rather than stacking them flat, and give glasses and stemware their own cells with paper inside and around each.
- Sheath every knife blade before it goes in a box, seal opened pantry items in bags, and toss perishables rather than paying to move them.
- Illustratively, an average kitchen fills around nine boxes; pack an open-first box with the coffee, a pan, and a few dishes, and keep it with you.
Why the kitchen is the hardest room to pack
Every room has its quirks, but the kitchen concentrates all of them at once. The contents are heavy and dense, so boxes fill and reach their weight limit fast; they are fragile, so almost everything needs individual wrapping; and they are wildly varied in shape, from flat baking sheets to bulbous stand mixers to a drawer of loose utensils that resists any neat arrangement. Add sharp knives, leak-prone bottles, and a pantry of food that ranges from fine-to-move to must-discard, and you have a room that punishes the last-minute approach harder than any bedroom or closet ever could.
The failure mode is always the same: the kitchen gets left until the final day because it is used until the final day, and then it gets packed in a panic. Glasses go in loose because there are no cells left, plates get stacked flat because standing them on edge takes a minute longer, knives get dropped in a box that someone later reaches into by feel, and the coffee maker ends up somewhere on the truck when it is the one thing you want the next morning. Nearly every one of those outcomes traces back to timing and supplies, not skill, which is precisely what the steps below fix. For how the kitchen fits the rest of the home, our packing roadmap sequences the whole move.
Before you start: what you need on hand
This roadmap works best if you settle a few basics first, so each step has real inputs rather than guesses. None of it takes research; it is information you already know or can pin down in a few minutes at the counter.
- A rough sense of your kitchen size. Minimal, average, well-stocked, or a serious cook or host’s kitchen, because that is the main driver of how many boxes and how much padding you need. This sets your supply order.
- How much fragile glassware and china you own. A cabinet of everyday tumblers is a different job from a hutch full of stemware and inherited plates, and the fragile count decides how many cell kits and how much paper to buy.
- Your move date, or a target week. The date tells you when to stop restocking the fridge and pantry, and when to start packing the least-used items so the daily dishes come last.
- A staging spot. A corner of the counter or the dining table where packed and labeled kitchen boxes can stack out of the way as you finish each cabinet.
The kitchen takes longer than most rooms per cubic foot because of the wrapping, so plan for a few unhurried sessions rather than one marathon. There is no special tool beyond boxes, paper, tape, and a marker, though cell dividers and a couple of specialty cartons make the fragile work faster. Difficulty is low to moderate, and the main skill is starting early enough that each shelf gets a calm, careful pass. With your kitchen size, your fragile count, and a move date in hand, the steps turn them into a supply list and an order of operations you can actually work.
Step 1: Gather the right kitchen packing supplies
Gather your supplies before you open a single cabinet, because stopping mid-shelf to run to the store is where shortcuts creep in. The kitchen kit is specific. Dish-pack boxes, also called dish barrels, are sturdier and often double-walled, built for the weight and fragility of dishware, and they are worth the small premium over standard boxes for plates and glasses. You also want a generous roll or bundle of clean packing paper, some bubble wrap for the most delicate pieces, glass and dish cell dividers that drop into a box to separate stemware and tumblers, strong packing tape, and a marker for labeling. Newsprint works in a pinch, but the ink can transfer, so keep it away from anything you eat off of directly.
Size and quantity are where people misjudge the kitchen. Favor small and medium boxes over large ones, because kitchen contents are dense and a large box of dishes or canned goods becomes too heavy to lift safely long before it looks full. As an illustrative guide on the model this roadmap uses, a minimal kitchen might need around six boxes, an average kitchen around nine, a well-stocked kitchen around thirteen, and a serious cook or host’s kitchen into the high teens, along with several bundles of paper and a few cell kits scaled to your glassware. Buy a little more than your estimate, because running out of paper mid-pack is exactly when a glass goes in bare and arrives in pieces.
Watch out for skimping on padding to save a few dollars, which is the false economy that shows up as broken dishes at the other end. A shattered set of glasses costs far more than the paper that would have cradled it. Free boxes from a grocery or liquor store can work for canned goods and non-fragile items, and liquor boxes with their built-in dividers are genuinely useful for bottles and glasses, but inspect any free box for strength and skip anything damp or flimsy for a heavy or breakable load. Assemble your kit on the counter before you begin, keep the tape and marker with the paper, and the whole pack moves faster. The companion below turns your kitchen size into a box count and a supply split.
Step 2: Pack in order, least-used items first
Pack the kitchen in a deliberate order, least-used items first, so the room stays usable while you work and the daily essentials are the last thing you seal. The logic mirrors the whole-home approach in our packing roadmap: the final box you pack should hold the first thing you will reach for at the new place. In a kitchen that means starting with the things you can clearly live without for a few weeks and ending with the coffee, a pan, and a few plates.
A workable order looks like this. First, the specialty and rarely-used: the fondue set, the roasting pan you use twice a year, holiday and fine dishware, serving platters, spare mugs, cookbooks, and the back-of-the-cabinet appliances. Next, the backup layer: second-string pots, duplicate utensils, extra glassware, and the pantry staples you can shop around for a couple of weeks. Then the everyday middle: most of your dishes, glasses, and cookware, packed in the days before the move. Finally, on the last day, the daily drivers: the coffee maker, one good pan, a handful of plates and bowls, a few glasses, and the utensils you actually use, which go into the open-first box you keep with you.
Watch out for the instinct to wait until you can pack the whole kitchen in one push; that push always arrives as a panic the night before. Packing a single high-cabinet of specialty gear one evening builds momentum and proves the order works. If your move is short-notice, keep the order but compress it, and lean harder on decluttering: the duplicate spatulas, the chipped mugs, and the appliance you have not used in a year do not need to make the trip at all. Our moving packing checklist lays this same sequence out as a week-by-week plan you can tick off.
Step 3: How to pack plates and bowls
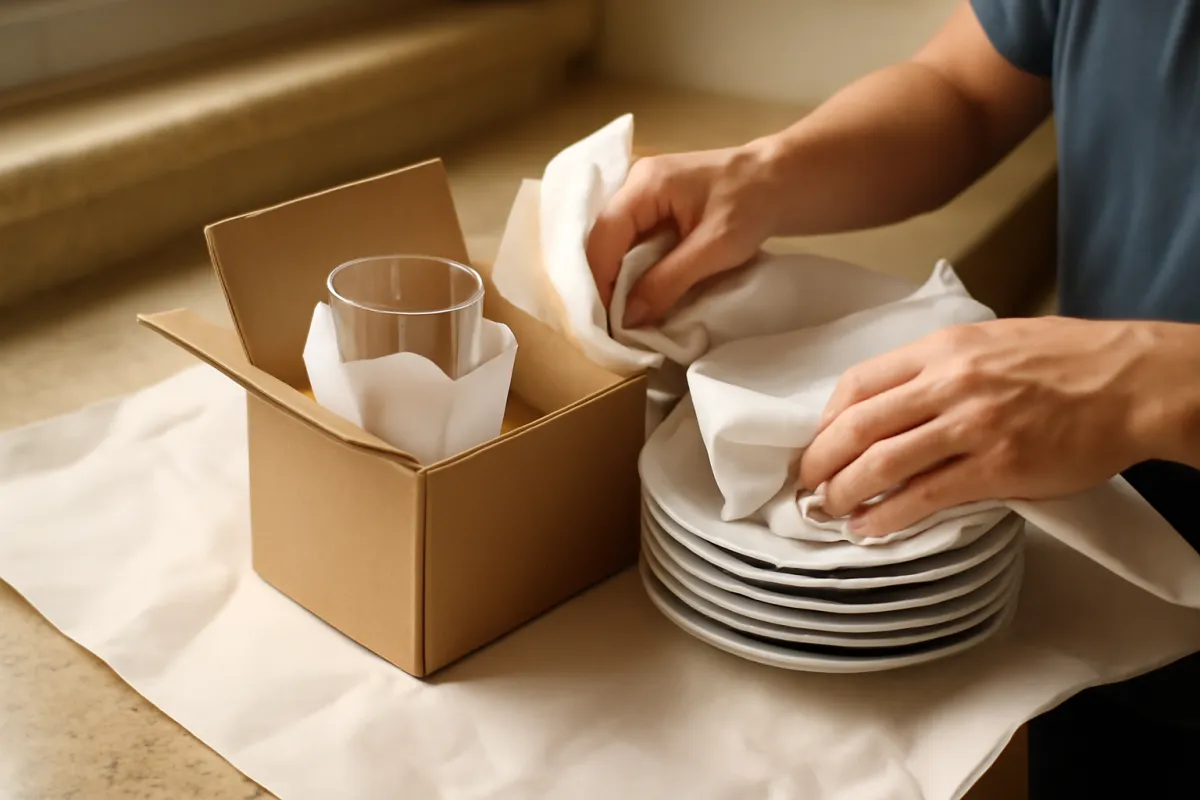
Plates are where the on-edge trick matters most, so give them a careful pass. Line the bottom of a small or medium dish-pack box with a thick layer of crumpled paper first, then wrap each plate individually. Lay a plate in the center of a few sheets, fold the paper over, and either wrap each one on its own or bundle three or four together with paper between every plate. Then stand the wrapped plates on their edges, vertically, like records in a crate, rather than stacking them flat. A plate on edge resists the downward pressure of a stack far better than one lying down, where the entire load presses on whatever plate is at the bottom.
Keep plates in the lower two-thirds of the box because they are heavy, pack them snugly so they cannot slide, and fill every gap and the top with more paper until nothing shifts when you gently shake the box. Do not overfill to the point the lid bulges, and keep the total weight to something one person can carry, which usually means a smaller box than you would expect. Bowls are more forgiving: wrap each one, then nest them in small groups of two or three with a sheet of paper between each, and stand the nested stack or lay it with padding all around.
Watch out for stacking bare plates flat, the single most common way dishes arrive cracked, and for boxing a mix of heavy plates and delicate glasses in the same layer without a divider. Mark every dish box fragile on more than one side and this-side-up on the top, and note on the label that it holds plates so it rides high in the load rather than under a stack of books. A little extra paper and a minute per plate is the whole difference between a set that survives and one that does not.
Step 4: How to pack glasses and stemware
Glasses and stemware are the most breakage-prone items in the entire move, so they earn cell dividers and patience. Drop a set of cells into a dish-pack box so each glass gets its own compartment and never touches another. For each glass, stuff a little crumpled paper inside to support the walls, wrap the outside in a sheet of paper or bubble wrap, and slide it into a cell standing upright. Everyday tumblers and mugs can go in this way quickly; mugs get their handles cushioned so the gap does not become a snap point. Fill the top of the box with a cushion of paper so the glasses cannot rattle up into the lid.
Stemware needs a step more. The stem is the weak point, and it snaps when the bowl is padded but the neck is left exposed. Wrap the bowl, then wrap the stem separately or add a paper collar around it, and use bubble wrap for anything with a delicate or long stem. A dedicated stemware carton, which has taller cells sized for wine glasses, is worth buying for a valued set. Whatever the container, glasses ride standing up, never on their sides, and always toward the top of the load rather than crushed under heavier boxes.
Watch out for the classic shortcut of nesting glasses inside one another to save space; they wedge, crack, and often break as you try to separate them at the new place. Wrap and separate every piece instead. Photograph a valuable crystal or inherited set before you wrap it, in case you ever need to document a claim, and consider carrying the truly irreplaceable pieces with you rather than loading them at all. Label the box fragile and this-side-up on more than one side, and tell whoever loads the truck that it needs to stay upright and high.
Step 5: How to pack pots, pans, and lids
Pots and pans are heavy but hardy, so they are a relief after the glassware. Nest them largest to smallest, the way they probably already live in your cabinet, with a sheet of paper between each to prevent scratches on nonstick or enameled surfaces. A set of three saucepans becomes one compact bundle this way. Wrap glass lids separately, because they are the fragile part of a cookware set, and either nestle them alongside the pots with padding or stand them on edge like plates in the same box. Cast iron and heavy stockpots go in small boxes on their own or with light filler, never stacked so high that the box cannot be lifted.
Fill the gaps inside and around the nested cookware with paper or even clean dish towels, which do double duty as padding and as items you needed to pack anyway. Bakeware, cutting boards, and sheet pans are flat and awkward, so stand them vertically along the side of a box rather than laying them flat where they waste space and slide. Small lids, cookware handles that detach, and any loose parts go in a labeled bag kept with their pot.
Watch out for building one giant box of all your cookware; it will be too heavy to move safely and its bottom will blow out on the stairs. Split heavy cookware across small boxes and keep each to a liftable weight. Sharp-edged tools like box graters or mandoline blades that live in the pots-and-pans cabinet should be wrapped and marked like knives, covered in the next step, because a bare grater edge in a box of pans is an easy cut waiting to happen.
Step 6: How to pack small appliances
Small appliances travel best in their original boxes, so if you kept the box for the coffee maker, the blender, or the stand mixer, use it. Those cartons were designed with fitted foam for exactly this trip. When the original box is long gone, wrap the appliance in paper or bubble wrap, coil and secure the cord with a tie or tape so it cannot whip around or scratch, and set the appliance in a box padded on all sides with crumpled paper. Remove and separately wrap any glass parts, a blender jar, a food processor bowl, a carafe, because those are the pieces that break, and pack loose blades wrapped and marked.
Heavier appliances like a stand mixer or a countertop oven go in their own small, sturdy box, padded generously and labeled heavy so it is lifted with care and not stacked under anything. Empty, clean, and dry every appliance before it goes in, especially a coffee maker or kettle with a reservoir, so no water leaks into a box of paper and dishes in transit. For anything with a removable, breakable attachment, treat the attachment as fragile glassware and the base as a heavy item, and keep the two together with a note on the label.
Watch out for coiling a cord too tight against a delicate housing, packing an appliance still damp inside, or burying the one appliance you use every morning deep in a box on the truck. The daily coffee maker or kettle belongs in the open-first box from Step 10, not on the truck at all. If you are on a long haul where boxes are handled more and travel farther, our long-distance roadmap covers the extra protection that longer trips reward.
Step 7: How to pack knives safely
Knives get their own step because they are the one kitchen item that can hurt whoever packs or unpacks the box. Never drop loose knives into a carton. Sheath each blade first: a purpose-made knife guard is ideal, but a few folded layers of cardboard taped closed around the blade, or a rolled dish towel secured with tape or a rubber band, works just as well. The goal is a blade that cannot poke through its wrapping or shift free in the box. A knife block can be wrapped whole with the knives seated and a band or wrap holding them in, and knives that live on a magnetic strip come off and get individually sheathed.
Once each blade is covered, bundle the knives together, ideally rolled inside a towel or laid in a small box, and mark the bundle plainly so that whoever opens it knows there are blades inside and does not reach in by feel. This is also the moment to give the same treatment to the other sharp offenders: kitchen shears, a mandoline and its blade, skewers, a box grater, a peeler, and any bare blade attachment from an appliance. These cause more moving-day cuts than the knives themselves because nobody expects them.
Watch out for two habits. First, packing knives with the edge unprotected because you are in a hurry, which turns unpacking into a reach-in hazard. Second, mixing bare blades in with wrapped dishes, where an edge can slice through paper and nick a hand or scratch a plate. Keep the sharp bundle clearly labeled and, if you can, carry your best chef’s knife with the open-first box so you have one good blade the first night without hunting for the sharp box.
Step 8: Sort the pantry (what to toss vs move)
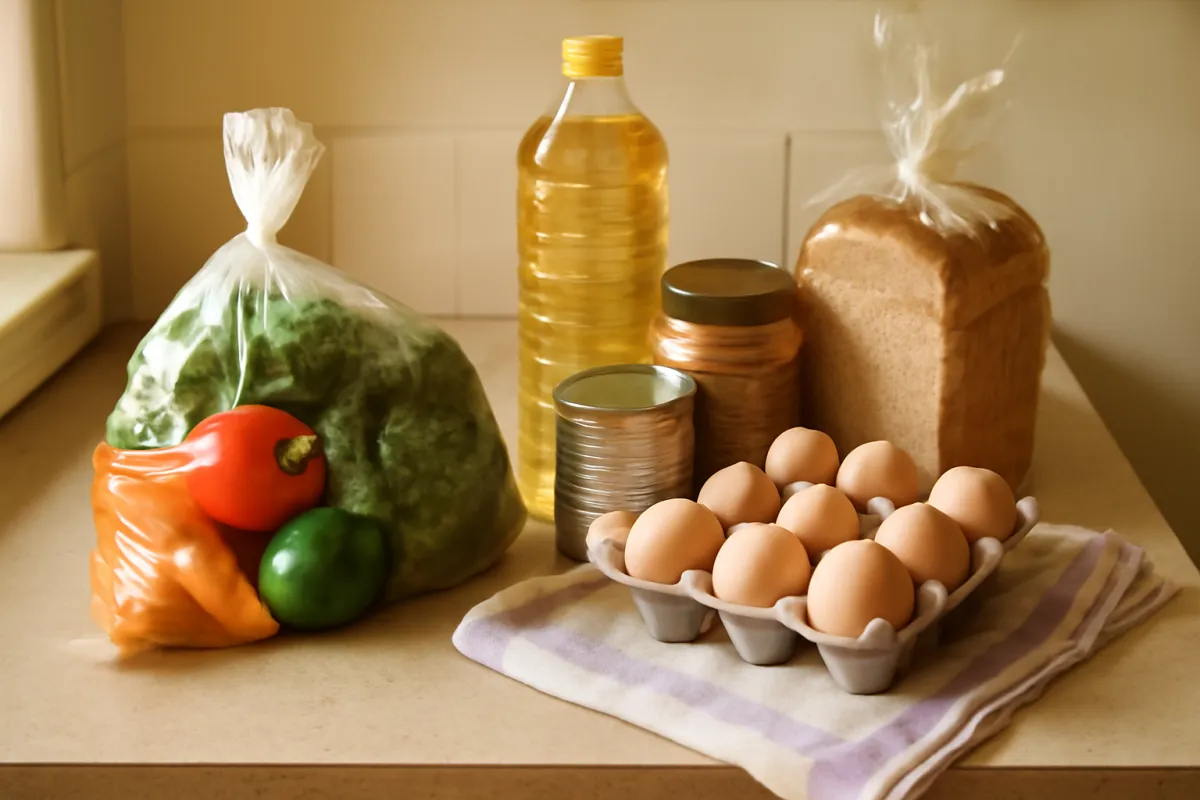
The pantry is where a kitchen pack turns into a decluttering job, and that is a good thing, because food is heavy relative to its value and much of it is not worth moving. Sort as you pack into three groups: move it, use it up, and toss it. Sealed, shelf-stable, non-perishable items move fine: canned goods, unopened jars, sealed dry pasta and rice, and spices, though canned goods are dense so keep them in small boxes. Anything perishable, frozen, or refrigerated is generally not worth moving, especially on a long trip in an unrefrigerated truck, so plan to run the fridge and freezer down in the last week rather than restocking.
Opened dry goods, half-used bags of flour, sugar, cereal, and snacks, should be sealed inside zip-top bags before boxing so they do not spill through the truck, and bottles and oils should stand upright, be taped at the cap, and be padded so they cannot leak onto everything around them. Be honest about the back-of-the-pantry graveyard: the expired cans, the stale spices, the sauce you bought for one recipe. Discarding those now means you are not paying to move and then unpack food you will only throw out later.
Watch out for a rule many people learn too late: most professional movers will not transport open food, perishables, or anything that can leak or attract pests, and some decline packed food entirely. Confirm your mover’s policy before you box the pantry, because a carton they refuse at the curb is one you have to unpack and redistribute on the busiest morning of the move. Whatever you cannot use or move, donate the unopened, unexpired items to a food bank rather than binning them; many will collect during a move.
Step 9: Label the kitchen boxes clearly
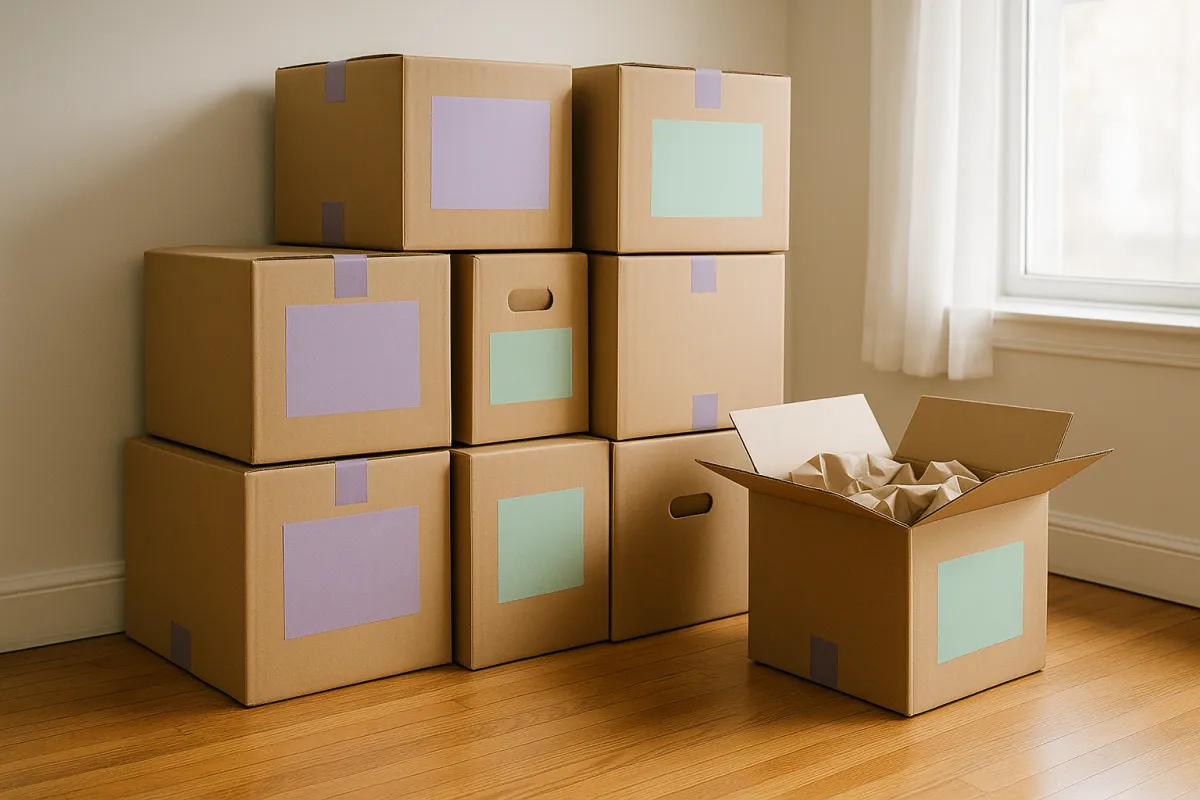
Labeling is the step that pays off most and gets rushed most, and in a kitchen full of fragile and heavy boxes it matters double. On every box, write the room (kitchen) and a few words on the contents, on the top and on at least one side, so a label is visible however the box is stacked. Add the two flags a kitchen box needs above all: fragile, on more than one side for anything with dishes or glass, and this-side-up so a box of standing plates and glasses is never flipped. A quick heavy marking on the cast-iron and canned-goods boxes tells whoever lifts them to bend their knees.
Number each box and jot the number and its contents on a simple inventory list, on paper or your phone, because a numbered list is how you confirm at the far end that every kitchen box arrived. Some people add a color code, a strip of colored tape that says kitchen at a glance, which makes it obvious where each box belongs when it comes off the truck and speeds up unpacking into the right room. Our moving packing checklist includes a labeling and inventory format you can reuse across every room, not just the kitchen.
Watch out for the vague label. Writing kitchen and nothing else tells you nothing when you are hunting for the one box with the coffee filters and the can opener. A few extra seconds noting glasses and mugs or pots and bakeware saves many minutes of digging later. Keep your inventory somewhere you will not accidentally pack it, and update it as you seal each box, so the count is always current and a missing box is impossible to overlook.
Step 10: Pack an open-first kitchen box
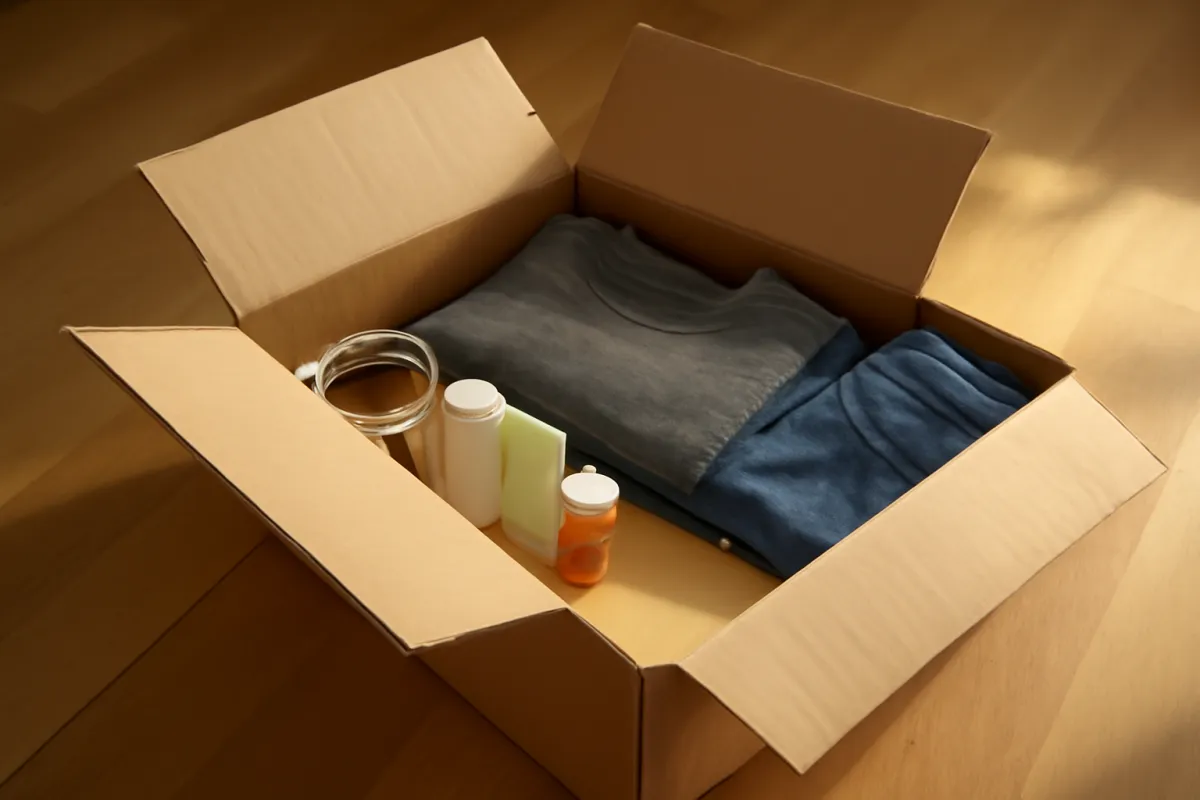
Set aside one open-first kitchen box, sometimes called a first-morning box, and treat it as the most useful carton of the whole move. It holds what you need to make the new kitchen functional on day one before you unpack anything else, and you keep it with you, in your own vehicle, rather than on the truck. Even on a local move you will be too tired to open a stack of boxes the first night, and on a long-distance move your shipment may arrive a day or several after you do, so the basics that make a coffee and a simple meal have to travel with you.
A workable open-first kitchen list includes the coffee maker or kettle and coffee or tea, a couple of mugs, a few plates and bowls, a handful of glasses, one good pan and a spatula, a chef’s knife (sheathed) and a cutting board, basic utensils, dish soap and a sponge, a roll of paper towels, and any trash bags. Add a small amount of easy food, and whatever a child or pet needs, so the first day starts with something normal rather than a search through sealed cartons. One clearly labeled box, plus the coffee, covers most households for the first morning.
Watch out for the classic error of packing this box early and then loading it on the truck out of habit. Pack it last, label it in a way that stands out from every other kitchen box, and physically set it by the door or in your car so it cannot be swept onto the truck. If you are moving with kids or pets who complicate the first day, our note on moving with pets covers keeping their routine intact through the chaos. This one box is the difference between a bearable first night and a frustrating one.
How many boxes you need for a kitchen
The honest answer is that it depends on how much you own, but an illustrative range lets you buy roughly the right supplies rather than guessing. The main driver is your kitchen size, from a minimal setup where you rarely cook to a serious cook or host’s kitchen packed with cookware, gadgets, and a full set of dishes. The chart below shows a rough total kitchen box count by size, on the model this roadmap uses, for a typical two-person household with a moderate glassware collection.
Illustrative kitchen boxes by kitchen size
A rough total box count for a kitchen by size, on this roadmap's illustrative model, for a typical two-person household. Illustrative, not a guarantee; your count depends on how much you own.
Favor small and medium dish-pack boxes over large ones, because kitchen contents are dense and a large box of dishes gets too heavy to lift safely. Buy a few more than the estimate and return the unused ones.
Those totals split across the kitchen by content type in a fairly predictable way, which is worth seeing because it tells you where your paper and your care should concentrate. Plates and bowls and the glassware together make up more than half of the boxes and nearly all of the fragility, while pots, appliances, and the pantry fill out the rest with sturdier contents. The breakdown below is an illustrative share of a kitchen pack by what goes in the boxes.
How a kitchen pack breaks down by contents
An illustrative share of kitchen boxes by what they hold, to show where the fragile work concentrates. Illustrative model; your split shifts with how you cook and entertain.
More than half your kitchen boxes hold something fragile, which is why paper and cell dividers, not extra boxes, are the supplies people most often underestimate.
An item-by-item kitchen packing table
When you are standing in front of a specific cabinet, it helps to have the method for each kind of item in one place. The table below collects the how-to for the things a kitchen throws at you, from the easy to the treacherous.
| Kitchen item | How to pack it |
|---|---|
| Plates | Wrap each in paper, then stand them on edge vertically in a dish-pack box, heavy end low, gaps filled. |
| Bowls | Nest in groups of two or three with paper between, then stand or lay the stack with padding all around. |
| Drinking glasses and mugs | One per cell divider, paper stuffed inside and wrapped outside, standing up; cushion mug handles. |
| Wine glasses and stemware | Wrap bowl and stem separately, use tall cells or a stemware carton, keep upright and high in the load. |
| Pots and pans | Nest largest to smallest with paper between, split heavy sets across small boxes, keep each liftable. |
| Lids | Wrap glass lids separately, then stand on edge like plates or nestle with padding beside the pots. |
| Knives and sharp tools | Sheath every blade in a guard, cardboard, or towel, bundle and mark clearly, carry your best knife with you. |
| Small appliances | Original box if kept, else wrap, coil the cord, pad on all sides; remove and wrap glass parts. |
| Bakeware and cutting boards | Stand vertically along the side of a box rather than laying them flat where they slide. |
| Pantry dry goods | Seal opened bags in zip-top bags, keep canned goods in small boxes, toss expired items. |
| Bottles and oils | Stand upright, tape the caps, pad against leaks, and keep away from paper and dishes. |
| Spices | Box upright in a small container so they do not tip and spill; discard stale ones now. |
A worked example: packing an illustrative kitchen
Run one realistic kitchen through the whole method. The mover: a two-person household with an average kitchen, a moderate collection of everyday glasses and a dozen pieces of nicer stemware, packing themselves about three weeks before the move.
They start by gathering supplies against an average kitchen: a mix of small and medium dish-pack boxes, a couple of glass cell kits, several bundles of packing paper, a roll of bubble wrap for the stemware, tape, and a marker, buying a little extra. Over the first evenings they pack the least-used items: the slow cooker, the holiday platters, the spare mugs, and the cookbooks. A few days out they wrap the everyday plates and stand them on edge, cell-pack the glasses with paper inside each, and give the stemware bowls and stems separate wraps in a taller carton. They nest the pots with paper between, box the blender with its jar wrapped separately, and sheath the knives in folded cardboard, bundling them with a bold label.
They sort the pantry as they go, sealing the opened flour and cereal in zip bags, keeping the canned goods in a small box, and discarding a shelf of expired odds and ends. Every box gets a contents label, a fragile mark where it is due, a this-side-up on the dish and glass boxes, and a number on a shared phone inventory. On the last morning they pack the open-first box: the coffee maker, two mugs, a few plates and glasses, one pan, a sheathed chef’s knife, a cutting board, dish soap, and paper towels, and they set it in the car.
On the illustrative model this roadmap uses, their average kitchen fills around nine boxes: roughly five for dishes and glassware, two for pots and appliances, one for the pantry, and the open-first box they keep out. Spread across a few unhurried evenings rather than crammed into the final night, the hardest room in the house turns into a short, finished list. That is the shape of the chart above: the fragile boxes are the majority, so the paper and the cells, not extra boxes, are what the pack really runs on.
Common kitchen-packing mistakes that cost you
The expensive errors in a kitchen cluster around the same roots: leaving it for last and skimping on protection. Collected in one place, the mistakes that most often break dishes or wreck the first morning.
- Stacking plates flat instead of on edge. A flat stack puts the whole load on the bottom plate and cracks it. Wrap each plate and stand them vertically like records instead.
- Nesting glasses to save space. Glasses wedged inside each other crack going in and break coming out. Wrap and separate every glass, one per cell.
- Packing knives and sharp tools bare. A loose blade in a box is a cut waiting for whoever unpacks. Sheath every edge and mark the bundle plainly.
- Building one giant, overweight box. A box of all your cookware or canned goods is a blown-out bottom and a hurt back. Keep dense items in small boxes you can actually lift.
- Moving food you should toss. Perishables and half-used bags are heavy, leak, and attract pests, and movers often refuse them. Sort the pantry and discard or donate first.
- Forgetting the open-first box. Load the coffee maker on the truck and the first morning becomes a search through sealed cartons. Pack one box of essentials and keep it with you.
- Vague or one-sided labels. A box marked only kitchen, or labeled only on top where you cannot see it in a stack, defeats the whole inventory. Label contents on more than one side.
Nearly every one traces back to leaving the kitchen until the last night, which is exactly what starting with the least-used items several days out prevents.
Troubleshooting: when packing the kitchen meets reality
Even a careful plan meets surprises. Here is how to handle the common ones without abandoning the method.
What if my move is last-minute and the kitchen is still full? Compress the steps rather than skipping them, and let decluttering carry the load. The less you pack, the less there is to wrap, so donate unopened pantry items and give away or toss the duplicates and the barely-used gadgets before you box anything. Gather supplies in one trip, pack by content type so nothing scatters, and use a simplified label of contents plus a fragile mark rather than no label at all. Even a rushed kitchen pack survives if the glasses get cells and the plates go on edge, so spend your limited time on the fragile items and move faster through the sturdy ones.
What if I have a lot of fine china or crystal? Give it extra time and better materials, and consider carrying the irreplaceable pieces with you rather than loading them at all. Use bubble wrap rather than just paper for the most delicate items, double-box a truly valuable set inside a slightly larger padded box, and photograph everything before you wrap it in case you need to document a claim. For a serious collection, fragile-only professional packing, where movers pack just the dishes and glassware, can be worth the cost and shifts the breakage liability, a tradeoff our note on what movers cost helps you weigh.
What if I run out of boxes or paper mid-pack? Do not improvise with newspaper on your eating surfaces or by stuffing glasses with towels you also need; pause and restock, because this is the moment shortcuts break things. In the meantime, clean dish towels, oven mitts, and pot holders are legitimate padding for pots and non-food-contact items, and they needed packing anyway. Keep a running note of what you are short on so one more supply run covers it, and remember most suppliers refund unused boxes, so over-buying is the cheaper mistake.
What if the movers will not take my packed food? Confirm the policy before you box the pantry, not at the curb. If they decline open or perishable food, plan to eat down the pantry and fridge in the final week, donate the sealed and unexpired items to a food bank, and move only the sturdy, sealed, non-perishable staples in a small box you carry yourself if needed. A little planning here saves you from unpacking and redistributing a refused box on the busiest morning of the move.
Run your own kitchen pack
Everything above assembles into a method you can run on your own kitchen across a few evenings rather than one exhausting night. Gather the right supplies; pack the least-used items first and the daily dishes last; stand your wrapped plates on edge; cell-pack the glasses and stemware; nest the pots and pad the appliances; sheath the knives; sort and seal the pantry; label every box on more than one side; and set aside an open-first box you keep with you. The same sequence works whether you are packing a galley kitchen or a cook’s kitchen, only the number of boxes and cell kits changes.
The companion beside this roadmap sizes the job for you. Choose your kitchen size, your household size, and how much fragile glassware you own, and it returns an illustrative kitchen box count, a rough split of dish, cookware, and pantry boxes, a cell-kit estimate for your glassware, and a plain-language plan for what to pack in what order. Change the kitchen size and watch the box count move; change the glassware and watch the cell kits and paper follow. Pair it with the calculator for the salary side of a relocation and our moving packing checklist for the rest of the home, and the dread of the hardest room becomes a supply list and a short order of operations.
Your kitchen packing checklist
Use this as the save-this version, the compact list you can run for any kitchen.
- Supplies first: dish-pack boxes in small and medium sizes, plenty of paper, bubble wrap, glass cell kits, tape, and a marker, bought with a little extra.
- Order: least-used items first (specialty gear, serving pieces, spare mugs), everyday dishes in the days before, daily drivers last.
- Plates: wrap each, stand on edge vertically in the lower part of the box, gaps filled, marked fragile and this-side-up.
- Glasses and stemware: one per cell, paper inside and around, stems wrapped separately, kept upright and high in the load.
- Pots, pans, appliances: nest with paper, split heavy sets across small boxes, wrap glass parts, coil and secure cords.
- Knives and sharp tools: sheath every blade, bundle and mark clearly, carry your best knife with you.
- Pantry: move sealed non-perishables, seal opened bags, stand and tape bottles, toss or donate the rest, check the mover's food policy.
- Open-first box: coffee setup, a pan, a few dishes and glasses, a sheathed knife, soap and towels, kept with you, not on the truck.
Print it, screenshot it, or rebuild it in the companion; the format matters less than starting a few days early so each fragile piece gets a careful wrap.
The bottom line
Packing a kitchen for moving comes down to the right supplies and the right order: gather dish-pack boxes, paper, bubble wrap, and cell dividers; pack the least-used items first and the daily dishes last; stand plates on edge; give glasses and stemware their own cells; nest the pots and pad the appliances; sheath every knife; sort and seal the pantry; label clearly; and keep an open-first box with you. Worked one cabinet at a time from a few days out, the room that produces the most broken dishes and the most first-morning misery becomes a short list of finished, findable boxes. Illustratively, an average kitchen fills around nine boxes, most of them fragile, which is why paper and patience, not extra cartons, are what the job really needs. Size the whole move with our packing roadmap and moving packing checklist, decide whether the soft goods want packing cubes, and let this one turn the hardest room into a plan you can actually work.
This roadmap is published by the ReloPeak desk as general education, not as a moving quote, a contract, or professional advice. The box counts, supply splits, and shares in it are illustrative, chosen to show how a kitchen pack fits together rather than to predict your own totals; what you actually need moves with how much you cook, how much glassware you own, and the move you are making. Packing methods for fine china, crystal, and specialty appliances vary, and some pieces are better handled by professional packers or carried with you, so treat the guidance here as a starting point to adapt rather than a rule for every kitchen. Confirm your mover’s policy on food and fragile items, and check appliance steps against the manufacturer’s own instructions, before you rely on them.
Frequently asked questions
How do I pack a kitchen for moving?
Pack a kitchen in a sequence rather than all at once, starting with the least-used items and saving daily dishes for last. Get the right supplies first: dish-pack boxes, plenty of packing paper, bubble wrap, and cell dividers for glasses. Wrap each plate and stand them on edge like records, nestle glasses and stemware into cells with paper inside and around each, nest pots and pans with padding, and sheath knife blades before bundling them. Sort the pantry as you go, tossing expired or opened perishables rather than paying to move them, then label every box by contents and mark the fragile ones on more than one side. Finish with an open-first box holding the coffee setup, a pan, a few dishes, and a knife, kept with you so the first morning is normal. Worked one shelf at a time, an intimidating room becomes a short list of finished boxes.
How do I pack dishes and plates for moving?
Wrap each plate individually in packing paper, then stand the plates on their edges vertically in a dish-pack box rather than stacking them flat. A plate on edge behaves like a record in a sleeve and resists the pressure of a stack far better than one lying down, where the whole load presses on the bottom plate. Line the box with a thick layer of crumpled paper first, keep plates in the lower two-thirds of the box because they are heavy, and fill every gap so nothing shifts when you shake the box gently. Bowls can be nested in small groups of two or three with paper between each, then stood or laid with padding all around. Mark the box fragile on more than one side and keep it toward the top of any stack, never crushed at the bottom.
How do I pack glasses and wine glasses for moving?
Use cell dividers, sometimes sold as glass or dish cell kits, so each glass rides in its own compartment and never touches its neighbor. Stuff a little paper inside each glass to support the walls, wrap the outside in paper or bubble wrap, and slide it into a cell, standing rather than lying down. Stemware needs extra care at the stem, which is the weak point: wrap the bowl and the stem separately, add a paper collar, and consider a specialty stemware carton for a valued set. Fill the top of the box with a cushion of paper so nothing rattles, and never let glass rest directly against glass. Label the carton fragile and this-side-up, and keep it high in the load rather than under heavier boxes.
What should I pack first in the kitchen?
Pack the least-used items first and leave the daily essentials for last, exactly as you would with any room. Start with specialty appliances, serving platters, holiday dishware, spare mugs, cookbooks, and anything you will not need in the weeks before the move. Work toward the middle with backup pots, extra utensils, and pantry staples you can live without, and save the coffee maker, a pan or two, a few plates and glasses, and the utensils you use daily for the final day. Packing in this order keeps the kitchen usable while you work, so you are not eating takeout for two weeks or digging through sealed boxes for a spatula. The very last things you pack should go into the open-first box you keep with you, not on the truck.
How many boxes do I need to pack a kitchen?
There is no single number because it depends on how much you own, but an illustrative range helps you buy supplies. On the model this roadmap uses, a minimal kitchen might fill around six boxes, an average kitchen around nine, a well-stocked kitchen around thirteen, and a serious cook or host's kitchen into the high teens. Lean on small and medium dish-pack boxes rather than large ones, because kitchen contents are dense and a large box of dishes quickly becomes too heavy to lift safely. Buy a few more boxes than you think you need, since running out mid-pack stalls the whole effort and most suppliers refund unused ones. The companion below estimates a kitchen box count and a supply split from your kitchen size and household.
How do I pack knives and other sharp kitchen tools safely?
Protect the blades and protect yourself: never toss loose knives into a box. Sheath each blade in a knife guard if you have one, or fold it into a few layers of cardboard or a dish towel and tape the bundle closed so the edge cannot poke through. A knife block can be wrapped whole with the knives seated and secured, and a magnetic strip's knives come off and get wrapped individually. Group the wrapped knives together, mark the bundle plainly so whoever unpacks knows a blade is inside, and stand it where it will not be grabbed blindly. The same care goes for mandolines, box graters, skewers, and kitchen shears, which cause more moving-day cuts than people expect.
What food should I move and what should I throw away?
Move sealed, shelf-stable, non-perishable food and let go of anything perishable, opened, or heavy relative to its value. Canned goods, sealed dry pasta and rice, unopened jars, and spices travel fine, though canned goods are dense so keep them in small boxes. Perishables, anything frozen or refrigerated, and half-used opened bags are usually not worth moving, especially on a long-distance move where they will spend days in a truck, so use them up, give them away, or discard them in the final days. Many professional movers will not transport open food, perishables, or anything that can leak or attract pests at all. Seal opened dry goods in zip bags before boxing, stand bottles upright and pad them, and plan to run the fridge and freezer down in the last week rather than restocking.
Should movers pack my kitchen or should I do it myself?
Either can work, and the right answer depends on your budget, your timeline, and how much fragile or valuable dishware you own. Packing the kitchen yourself saves money and is entirely doable with the right supplies and a few unhurried evenings, which is what this roadmap is built around. Paying for professional packing, or just fragile-only packing of the dishes and glassware, buys speed and shifts the liability for breakage onto the mover, which can be worth it for a china set or a very tight schedule. Our note on what movers cost breaks packing services out as their own line so you can weigh it. If you do hire packers, still set aside your own open-first box, and photograph valuable pieces before anyone wraps them in case you ever need to document a claim.